An ADSS route should not be designed by buying a list of clamps and deciding where they fit in the field. Each structure along the route has a mechanical job: support the cable, anchor tension, change direction, transition down a pole, store slack, protect a splice location, or control movement. The installation accessories should be assigned to those jobs before construction begins.
This guide shows how to build that route-level hardware map for all-dielectric self-supporting cable. It focuses on which hardware family belongs at which type of route node, what information must be checked before selection, and what the field team should verify at handover. It does not replace the cable manufacturer's sag-tension data, the hardware manufacturer's installation instructions, structural calculations, utility clearances, or local construction rules.
If you are sourcing specific products rather than planning the route, use DIMI's ADSS fiber optic cable hardware commercial section. For the broader product family, see fiber optic cable hardware.
Start With Route Nodes, Not a Parts List
The same ADSS cable can require different hardware at adjacent poles. A straight-line support point does not have the same mechanical duty as a terminal structure. A splice pole creates different routing and maintenance requirements from a simple tangent pole. A large route deviation may require anchoring rather than the suspension arrangement used at a small deflection.
Before specifying accessories, classify every structure on the route. A useful route schedule starts with the pole or tower ID, the span on each side, route direction, structure function, cable model, and any special condition such as a splice, road crossing, high exposure, or vertical transition.
| Route node | Primary mechanical job | Typical hardware family to evaluate | Critical design input |
|---|---|---|---|
| Straight / tangent support | Carry the cable and transfer support loads to the structure | Suspension clamp or approved tangent support, plus compatible attachment hardware | Cable construction, OD, span, design load, support geometry |
| Small route deviation | Support cable while accommodating an approved direction change | Suspension or tangent hardware only if the selected system permits the actual angle and load | Line angle, span imbalance, cable and hardware limits |
| Large angle / section point | Control axial tension and separate mechanical sections | Dead-end / tension hardware, sometimes on both directions, plus structure attachment hardware | Route geometry, design tension, structure capacity, hardware arrangement |
| Terminal structure | Terminate the cable's tensile load | Dead-end / tension assembly and compatible pole or tower connection | Cable model, rated mechanical data, final sag-tension design |
| Down-lead transition | Guide cable from aerial route to closure, cabinet, building or underground entry | Down-lead clamps, brackets, stand-off hardware and bend-path controls | Vertical route, clearance, bend radius, access and closure position |
| Splice / slack location | Store reserve cable and provide a maintainable splice transition | Slack-storage hardware, closure bracket, down-lead hardware and cable supports | Required reserve length, closure location, maintenance access, bend control |
| Vibration-sensitive or highly exposed span | Control cable motion where the line design identifies a vibration risk | Approved vibration-control hardware matched to the cable and route | Cable tension, span, terrain, wind exposure and manufacturer guidance |
| Construction / stringing point | Control the cable temporarily during installation | Approved temporary grips, stringing blocks or hardware permitted for installation use | Installation method, pulling tension, cable protection and hardware-specific instructions |
This table is a planning framework, not a universal bill of materials. The exact accessory type can change with cable construction, route geometry, loading, attachment system and utility practice.

What the Main ADSS Installation Accessories Actually Do
Suspension Clamps and Tangent Supports
Suspension hardware supports the running cable at intermediate structures. Its job is different from a dead-end: it transfers support loads without turning the point into an axial termination. The selected hardware must match the cable and the mechanical conditions at that structure.
Do not select a suspension clamp from cable diameter alone. Check the approved cable model, the manufacturer's applicable diameter range, span and loading conditions, line-angle limits, jacket compatibility, required inserts or armor rods, and the structure interface. A clamp that physically closes around the cable is not automatically a qualified system.
DIMI already has a dedicated suspension clamp guide for readers who need the component-level selection and installation task. This route guide keeps suspension hardware in its system context.
Tension and Dead-End Assemblies
A dead-end or tension assembly transfers axial cable load into the supporting structure. It is typically evaluated at route terminals, section points and direction changes where the line design requires anchoring rather than simple support.
The complete load path matters: cable gripping element, thimble or eye, link, shackle, bracket, banding or bolted attachment, and the supporting pole or tower must work as one assembly. Substituting one apparently similar fitting can change geometry, articulation, grip behavior or load transfer.
Use the separate dead-end clamp guide when the primary task is choosing or understanding that hardware family. For route mapping, the decision is whether the structure must support the running cable or anchor the cable's axial load.
Pole and Tower Attachment Hardware
The clamp is only one part of the attachment. The structure may require a bracket, eye, clevis, shackle, banding arrangement, bolt pattern or stand-off component before the cable hardware can be connected correctly.
Record this interface on the route schedule instead of treating it as a field detail. Pole material, available attachment points, drilling restrictions, banding requirements, clearances and the direction of the load can all affect the connection. The attachment hardware must be compatible with both the ADSS assembly and the structure design.
Down-Lead Clamps
When the cable leaves the aerial path and runs vertically toward a closure or entry point, the problem changes from span support to controlled routing. Down-lead clamps keep that transition organized while helping maintain separation, bend control and a defined path down the structure.
The transition should be designed as a sequence: top transition, intermediate supports, closure approach, reserve cable and final entry. The DIMI down-lead clamp guide covers that task in greater detail.
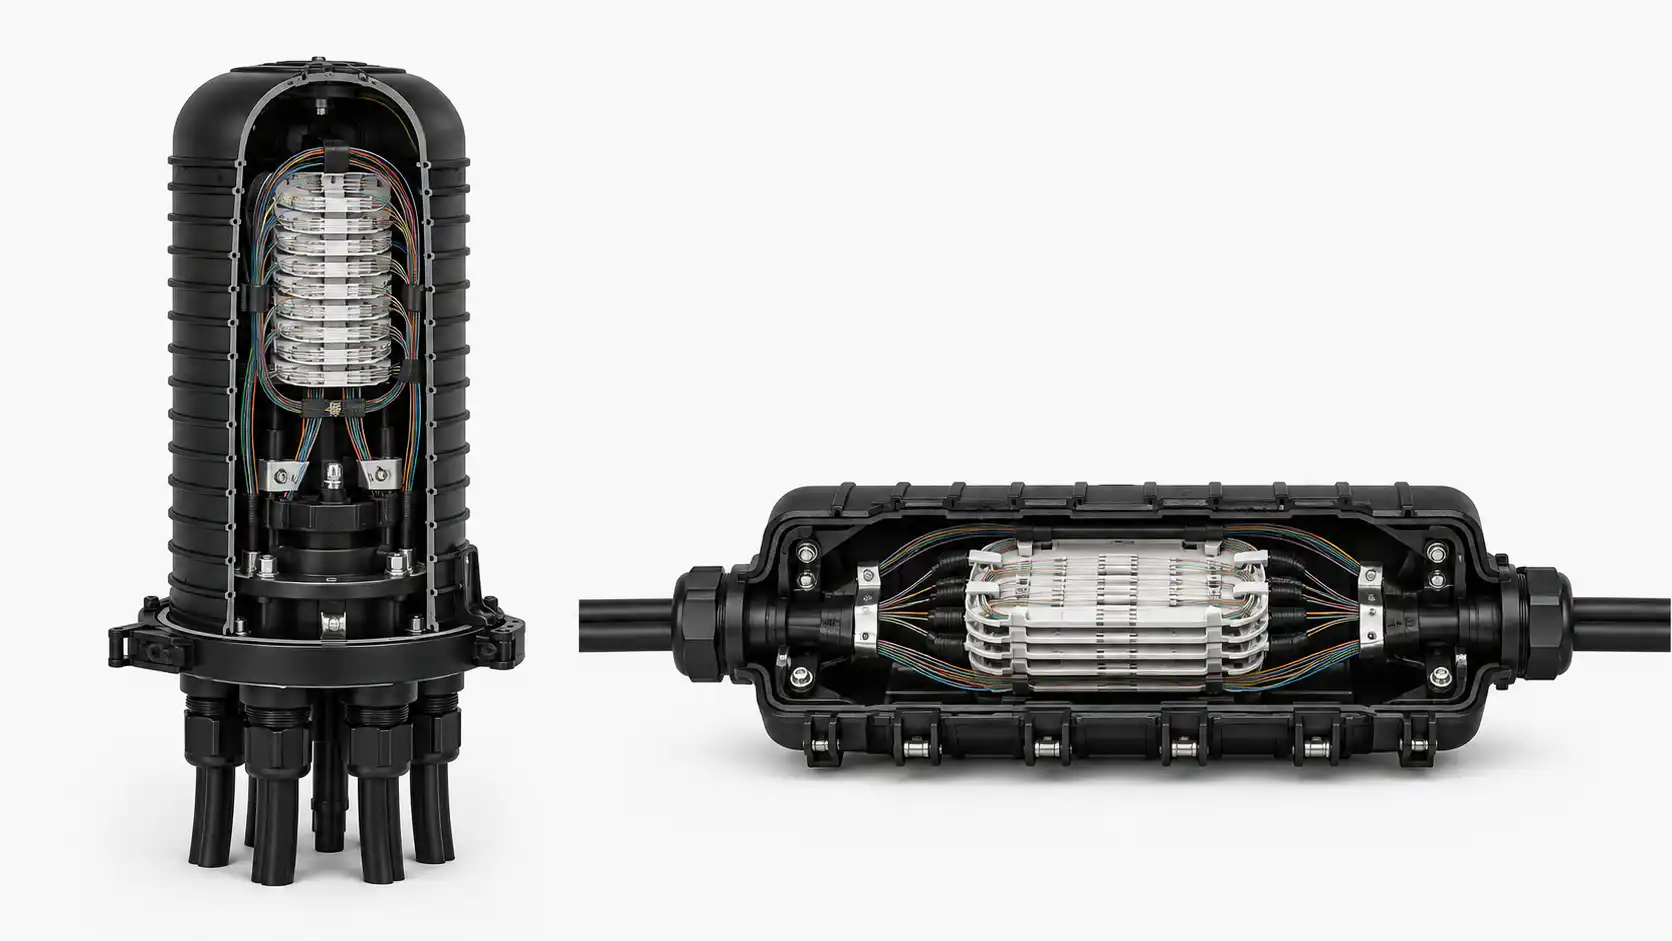
Slack Storage and Splice-Location Hardware
A splice point needs more than a closure. The route plan must provide a controlled place for reserve cable, a maintainable path into the enclosure and enough physical separation to prevent stored loops from rubbing against hardware, climbing space or other utilities.
Slack-storage brackets or in-span storage systems should be selected for the actual cable and required reserve arrangement. The bend path, attachment method and future removal path all matter. Do not create a tight decorative coil merely to make the installation look compact.
Vibration-Control Hardware
ADSS can experience wind-induced motion, but a vibration damper is not a generic accessory that should be added at an arbitrary distance from every clamp. The need, type, quantity and placement depend on the cable, installed tension, span, terrain, exposure and the hardware manufacturer's design method.
If the route assessment identifies vibration as a design issue, use the cable and damper manufacturer's engineering guidance. Do not copy damper spacing or quantity from another project because the cable diameter looks similar.
Armor Rods and Cable-Protection Components
Some suspension and tension systems use armor rods, structural reinforcing rods, inserts or other components to distribute contact pressure and protect the cable. These parts belong to the qualified hardware system. Their presence, length, direction and installation sequence should come from the exact assembly instructions.
Do not add or remove rods to make a mixed hardware set fit. A component from a different clamp family may alter grip length, contact pressure or the way the assembly transfers load.
Temporary Installation Hardware
Permanent support hardware and installation tooling are not always interchangeable. Stringing blocks, temporary grips and pulling devices are used to control the cable during construction. Some permanent support products may be approved for specific stringing functions, while others explicitly are not.
The work method should identify which device is used during pulling, when the cable transfers into permanent hardware, and how the cable is protected through that changeover. Never assume a suspension unit can be used as a stringing block unless its manufacturer permits that use.

A Practical Pole-by-Pole Hardware Mapping Method
A route hardware map converts the design into a structure-by-structure schedule. The following workflow is useful before requesting quotations or issuing construction packages.
Step 1: Freeze the Cable Identity
Record the exact ADSS cable model or approved construction for the route segment. Hardware selection depends on more than fiber count. At minimum, the designer normally needs the cable's physical and mechanical data from the approved cable documentation, including outside diameter and the tensile parameters used by the line design.
If the cable model is still changing, the hardware schedule is not ready to freeze. Mark affected structures as provisional instead of assigning a final clamp part number to incomplete input data.
Step 2: Classify Every Structure
For each pole or tower, record whether it is tangent, small-angle support, major angle, terminal, section point, splice point, down-lead point or a special crossing. One structure can have more than one role. A splice pole, for example, may also be a dead-end structure with slack storage and a down-lead path.
Step 3: Record the Mechanical and Geometric Inputs
Use the approved route and line design to capture span lengths, line angles, elevation differences, design loading, sag-tension requirements, attachment elevations and structure geometry. Where the route shares utility structures, also record the required electrical and physical clearances established by the project.
Step 4: Assign a Hardware Function Before a Product
Write "suspension," "dead-end," "down-lead," "slack storage," "vibration control," or another functional requirement before choosing a catalog item. This prevents a familiar product from being forced into the wrong route job simply because it is already in stock.
Step 5: Match the Complete Assembly
Confirm the cable-contact component and the complete connection string. Check the clamp or formed-wire set, inserts or rods, thimble, shackle, link, bracket, bands or bolts, and any optional protection component as a coordinated assembly.
Step 6: Lock the Installation Instruction
The bill of materials should identify the approved installation instruction or drawing for each hardware family. That document owns product-specific values such as allowable angle, grip arrangement, bolt torque, installation tension, rod orientation or special tooling. Do not place generic numbers in a route schedule unless the project's engineering authority has approved them for that exact system.

Illustrative Route Map
The following example shows the logic, not a design to copy.
| Structure | Illustrative route role | Hardware function to define | Verification before release |
|---|---|---|---|
| P01 | Route start / terminal | Dead-end assembly + structure attachment | Cable match, load path, attachment geometry, installation instruction |
| P02 | Straight intermediate pole | Suspension / tangent support | Cable compatibility, span/load condition, attachment interface |
| P03 | Direction change | Suspension or anchoring arrangement as required by engineering design | Actual line angle and load compared with selected hardware limits |
| P04 | Splice and maintenance point | Anchoring/support as designed + slack storage + down-lead + closure support | Reserve path, bend control, service access, closure location, cable identification |
| P05 | Exposed long span | Primary support/anchor hardware + any engineered vibration-control requirement | Cable tension, exposure, hardware qualification and damper design if required |
| P06 | Route end / terminal | Dead-end assembly + structure attachment | Final load path, sag-tension handoff, hardware completion and inspection |
The value of this schedule is traceability. A reviewer should be able to ask why a certain hardware family is at a certain structure and find the answer in the route role and engineering inputs.
Selection Inputs That Should Be Available Before Procurement
A supplier cannot reliably convert "we need ADSS accessories" into a project-ready bill of materials without route and cable information. Before commercial selection begins, assemble the inputs that affect the hardware job.
- Exact cable identity: approved model or construction, outside diameter, sheath type and the mechanical data used by the line design.
- Route schedule: pole/tower IDs, span lengths, line angles, terminals, section points, splice points and special crossings.
- Design loading: the project's wind, ice, tension and other mechanical design conditions.
- Structure interface: wood, steel, concrete or other structure; existing eyes, holes, brackets, cross-arms or banding constraints.
- Electrical environment: installation position on the utility structure, clearances, electric-field assessment and any cable/hardware measures required by the utility design.
- Environmental exposure: corrosion, pollution, UV, temperature range, coastal exposure or other conditions that affect material and coating choices.
- Construction method: pulling direction, stringing equipment, temporary grips, access restrictions and planned changeover into permanent supports.
- Splice and maintenance plan: enclosure locations, reserve cable, down-lead path, storage arrangement and safe access for future work.
DIMI's current product information for ADSS tension clamps explicitly asks buyers to provide cable OD/model and span or load requirement as selection inputs. Those are useful RFQ fields, but exact product performance values should still be confirmed against the approved model documentation before release.
Do Not Use One Hardware Rule for Every Pole
Shortcut 1: "Straight poles get suspension; every angle gets a dead-end."
That is too crude. Some suspension systems allow a defined range of line-angle change, while a larger or more heavily loaded deviation may require anchoring or another engineered arrangement. The actual decision belongs to the hardware limits and line design.
Shortcut 2: "The cable OD fits, so the clamp fits."
Diameter is necessary but not sufficient. Hardware qualification can depend on cable construction, jacket, tensile characteristics, span, loading and the specific gripping system.
Shortcut 3: "Add a vibration damper to be safe."
Random damper selection and placement is not a substitute for vibration design. An accessory that is mismatched or positioned incorrectly may not address the motion the route actually experiences.
Shortcut 4: "Pole attachment is the installer's problem."
The attachment determines how load enters the structure. Missing brackets, incompatible eyes, unsuitable banding geometry or an improvised shackle can invalidate an otherwise correct cable clamp selection.
Shortcut 5: "A splice closure location only needs a closure bracket."
A maintainable splice site also needs cable routing, reserve storage, bend control, down-lead support, labeling, access and a defined path for future removal or re-entry.
Field Acceptance: Inspect the Whole Load Path
Handover should verify the route hardware against the approved drawing and installation instructions, not simply confirm that a clamp is present on every pole.
- Correct cable and hardware identification at each structure.
- Correct structure role: support, dead-end, transition, storage or other planned function.
- All required assembly components present and installed in the documented order.
- Preformed rods, inserts or gripping elements seated as required, without obvious crossing, displacement or incomplete application.
- Cable jacket free of visible cuts, crushing, severe abrasion or unintended contact with sharp hardware.
- Hardware aligned with the intended load direction and connected to the correct attachment point.
- Bolts, pins, cotters, shackles and other retainers completed according to the exact product instruction.
- Down-lead route maintains the approved bend path, separation and access clearances.
- Slack storage is controlled and serviceable rather than tightly bent or allowed to rub against the structure.
- Any vibration-control or electrical-field protection components are the specified items and are placed according to their design instructions.
- Structure ID, installed hardware, deviations, photographs and required test/inspection records are captured in the as-built package.
Do not use a universal torque, tension, rod spacing, clamp spacing or bend-radius value in place of the approved product and cable documentation. Those values are system-specific.

Standards and Documentation Boundary
For ADSS installed on utility structures, the standards framework is broader than a single clamp datasheet. IEEE 1222 covers testing and performance topics for ADSS cable, including installation, environmental considerations and accessories; the current standard also has a published 2025 corrigendum. IEEE 1591.2 addresses testing and performance of ADSS hardware, and IEEE currently has an active revision project for that hardware standard.
Use the current applicable revision required by the project, utility and jurisdiction. Standards define qualification and acceptance frameworks; they do not replace the selected cable and hardware manufacturers' application tables or the project-specific line design.
Build the Procurement Package From the Route Map
Once the route is classified, procurement can request hardware against a controlled schedule instead of a vague accessory list. A useful package includes the cable datasheet, route structure schedule, drawings, structure interfaces, environmental requirements, approved standards, required documentation and the quantity of each hardware function.
Keep supplier, manufacturer, factory, wholesale and price queries with the commercial owner. This article's job is to make the technical requirement clear enough that those commercial discussions start from a defined system rather than from a generic clamp name.
For commercial selection, continue to DIMI's ADSS cable hardware category. For upstream route decisions about the cable itself, see the outdoor fiber optic cable route guide.
Final Rule: Map the Mechanical Job Before the Hardware Part Number
A reliable ADSS accessory schedule starts with the route, not the catalog. Classify each structure, define its mechanical and maintenance job, record the cable and route inputs, assign the required hardware function, and only then select the compatible assembly.
That approach also makes installation easier to inspect. Instead of asking whether every pole has "some clamp," the project team can verify whether each structure has the correct support, anchoring, transition, storage and protection function for the approved route design.