MPO connectors place multiple optical fibers in one compact interface, making them a practical choice for high-density structured cabling, parallel optics and preterminated data-center links. The challenge is not recognizing an MPO connector. It is specifying the correct assembly.
Two MPO cables can look nearly identical and still differ in fiber count, ferrule format, pinning, key orientation, polish, polarity, fiber type or insertion-loss performance. Any one of those differences can make an assembly unsuitable for the equipment at one or both ends.
The safest selection rule is simple: start with the exact optical interface specified for the transceiver or equipment, then build the cable specification around that interface. Ethernet speed alone is not enough. Cisco's current 400G portfolio, for example, includes modules using MPO-12, MPO-16 and duplex LC interfaces at the same nominal line rate, while its 800G OSFP portfolio includes both MPO-16 and dual-MPO-12 configurations. See the Cisco 400G QSFP-DD module data sheet and Cisco 800G OSFP module data sheet for concrete examples.
What Is an MPO Connector?
MPO stands for multi-fiber push-on. It is a standardized family of rectangular optical connector interfaces that aligns multiple fibers in a single mating interface instead of using a separate connector for every fiber.
The MPO family is covered by international connector-interface standards. IEC 61754-7-1 defines one-row MPO connector interfaces, while IEC 61754-7-2 defines two-row variants. These standards describe interface geometry; a complete cable specification still has to address the optical and mechanical details required by the application.

Important MPO Connector Features
- MT ferrule: Holds the fibers in a precise array so corresponding fibers can align during mating.
- Guide pins and holes: Establish the mechanical alignment between mating ferrules.
- Key orientation: Controls connector orientation and affects how fiber positions line up through adapters and cable assemblies.
- Fiber positions: Each fiber occupies a defined location in the array. Position numbering becomes important when polarity is traced.
- Housing and boot: Protect the ferrule and cable while providing the connector's push-pull mechanical interface.
For purchasing purposes, treat "MPO" as the start of a specification, not the specification itself.
MPO vs MTP: What Is the Difference?
MPO describes the standardized multi-fiber connector format. MTP® is US Conec's branded MPO connector family. US Conec describes MTP® as its own MPO product family with additional engineered features and performance options. The manufacturer's MTP® connector overview provides the primary-source terminology.
An MTP® connector therefore belongs to the MPO family, but the term MPO does not mean every connector is an MTP® product. If a project specification explicitly calls for MTP®, order the specified branded connector. If it only calls for an MPO-compatible interface, compare the actual interface and performance requirements.
For a deeper comparison focused on specification decisions, see Dimi Fiber's MTP vs MPO engineering selection guide.
MPO Selection Matrix: What to Verify Before Ordering
The most useful shortcut is not a table that says "400G equals MPO-16" or "800G equals MPO-16." Those rules fail as soon as a different optical interface is used. Instead, use a decision matrix that tells you what to verify and where to verify it.
| Check | Why It Matters | Where to Verify |
|---|---|---|
| Exact transceiver or equipment part number | Identifies the actual optical interface rather than only the line rate or form factor | Manufacturer data sheet or compatibility guide |
| Optical application | Defines lane arrangement, reach and media requirements | Transceiver data sheet and applicable optical specification |
| Fiber type | Determines whether the channel uses single-mode or multimode fiber and which grade is required | Optical interface specification |
| Fiber count and ferrule format | Must match the number and arrangement of optical lanes | Equipment connector specification |
| Pinning at each end | Determines whether mating ferrules can align mechanically | Equipment, adapter, cassette and cable specifications |
| Polish | End-face geometry must match the mating interface | Manufacturer data sheet |
| Polarity | Every transmitter must reach the intended receiver | End-to-end channel map |
| Cable construction | Determines whether the assembly is a trunk, patch cord, breakout or another functional design | Installation design and cable specification |
| Insertion-loss requirement | The full channel must remain within the optical application's loss budget | Optical specification plus channel loss calculation |
MPO Fiber Counts: MPO-8, MPO-12, MPO-16 and MPO-24
MPO systems are available in several fiber-count arrangements. The number in a product name is useful, but it should always be checked against the actual ferrule layout and equipment interface.

MPO-8
Eight active fibers are commonly used for four transmit and four receive lanes in parallel-optics applications. Classic SR4 links use this basic arrangement. In some base-8 systems, eight active positions are used within a connector format associated with a 12-position ferrule, so the equipment and assembly documentation should be checked rather than relying on the "MPO-8" label alone.
MPO-12
MPO-12 uses one row of 12 fiber positions. It is common in structured cabling and is also used by optical interfaces that activate only eight of those positions. This can offer architectural flexibility, but it may also leave unused fibers in some designs.
MPO-16
MPO-16 provides a 16-fiber single-row interface for applications that require a higher lane count. It is used by some modern 400G and 800G modules. It should not be treated as a drop-in "larger MPO-12"; the equipment interface, keying and ferrule format must explicitly support the 16-fiber design.
MPO-24
MPO-24 uses a multi-row arrangement and is often applied where high fiber density, trunk aggregation or conversion to lower-count interfaces is required. Again, more fibers do not automatically mean a better or more future-proof choice. Compatibility depends on the full interface and fiber map.
MPO Male vs Female: Pinned and Unpinned Connectors
MPO connectors are often described as male and female, although pinned and unpinned are more descriptive terms. A pinned connector contains guide pins; an unpinned connector contains the corresponding guide-pin holes. The two mating ferrules need the correct pin relationship for alignment.
The Fiber Optic Association's MPO testing and polarity reference illustrates the pin/no-pin arrangement and explains why the connector configuration has to be understood as part of the complete cable plant.
Do not choose pinning from habit. Check what the cable will mate with at each end: a transceiver, adapter, cassette, panel, another cable assembly or another optical component. Two cables can match in fiber type, count and polarity and still be mechanically wrong if their pinning does not match the intended connection.
MPO APC vs UPC: Match the Optical Interface
It is tempting to simplify MPO polish into a rule such as "multimode equals UPC and single-mode equals APC." That is not reliable enough for current equipment.
APC and PC/UPC describe connector end-face geometry. The correct choice is the one required by the mating interface. Cisco's 400G QSFP-DD data, for example, lists the QDD-400G-SR8-S as an MPO-16 APC multimode interface while other multimode products in the same portfolio use UPC or LC interfaces. That is a useful, datasheet-backed reminder that fiber type alone does not determine MPO polish.
Never mate APC and non-APC MPO interfaces merely because the housings appear to fit. Verify the polish at both connection points.
MPO Polarity: Method A, Method B and Method C
Every optical link ultimately has to connect a transmitter to the correct receiver. With an MPO array, multiple fiber positions are involved, so polarity has to be managed across the entire channel.
The common Method A, B and C descriptions refer to different ways fiber positions are mapped through an MPO cable. The Fiber Optic Association reference shows the three mapping patterns and the associated keying and adapter considerations.

Method A: Straight-Through Mapping
In a Method A cable, fiber positions remain in sequence from one end to the other: position 1 maps to position 1, position 2 to position 2, and so on. If a Tx/Rx reversal is needed, it must be introduced elsewhere in the channel design.
Method B: Reversed Array
Method B reverses the fiber order across the array. In a 12-position example, position 1 maps to 12, position 2 maps to 11, and the pattern continues across the ferrule. This can be useful in parallel-optics designs, but the label "Type B" by itself does not prove that the whole channel is correct.
Method C: Pairwise Flip
Method C swaps adjacent fiber pairs. It has been used in duplex-oriented structured cabling designs where pairwise reversals are required, but it can be harder to extend or migrate because those pair swaps have to remain consistent throughout the system.
Why Polarity Must Be Checked End to End
A cable's polarity label describes how that component maps fibers. It does not automatically describe the entire link.
Transceiver → patch cord → adapter → trunk → cassette or adapter → patch cord → transceiver
Then trace each active fiber position from Tx to Rx. This is more dependable than choosing a polarity method from a generic application table.
MPO Cable Types: Trunk, Patch Cord, Breakout and Cassette
Once the optical interface is known, choose the assembly architecture that fits the installation. Dimi Fiber's guide to MPO trunk, breakout and patch cable types covers these construction choices in more detail.
MPO-to-MPO Trunk
A trunk carries multiple fibers between MPO interfaces and is typically used between distribution areas, patch panels, equipment rows or structured cabling zones. Trunks are useful when pathway density and installation speed matter.
MPO Patch Cord
An MPO patch cord is generally used for shorter equipment or panel connections. Do not treat "patch" and "trunk" as length labels only; jacket, cable diameter, pinning, routing environment and mechanical requirements can differ.
MPO-to-LC or Other Breakout Cable
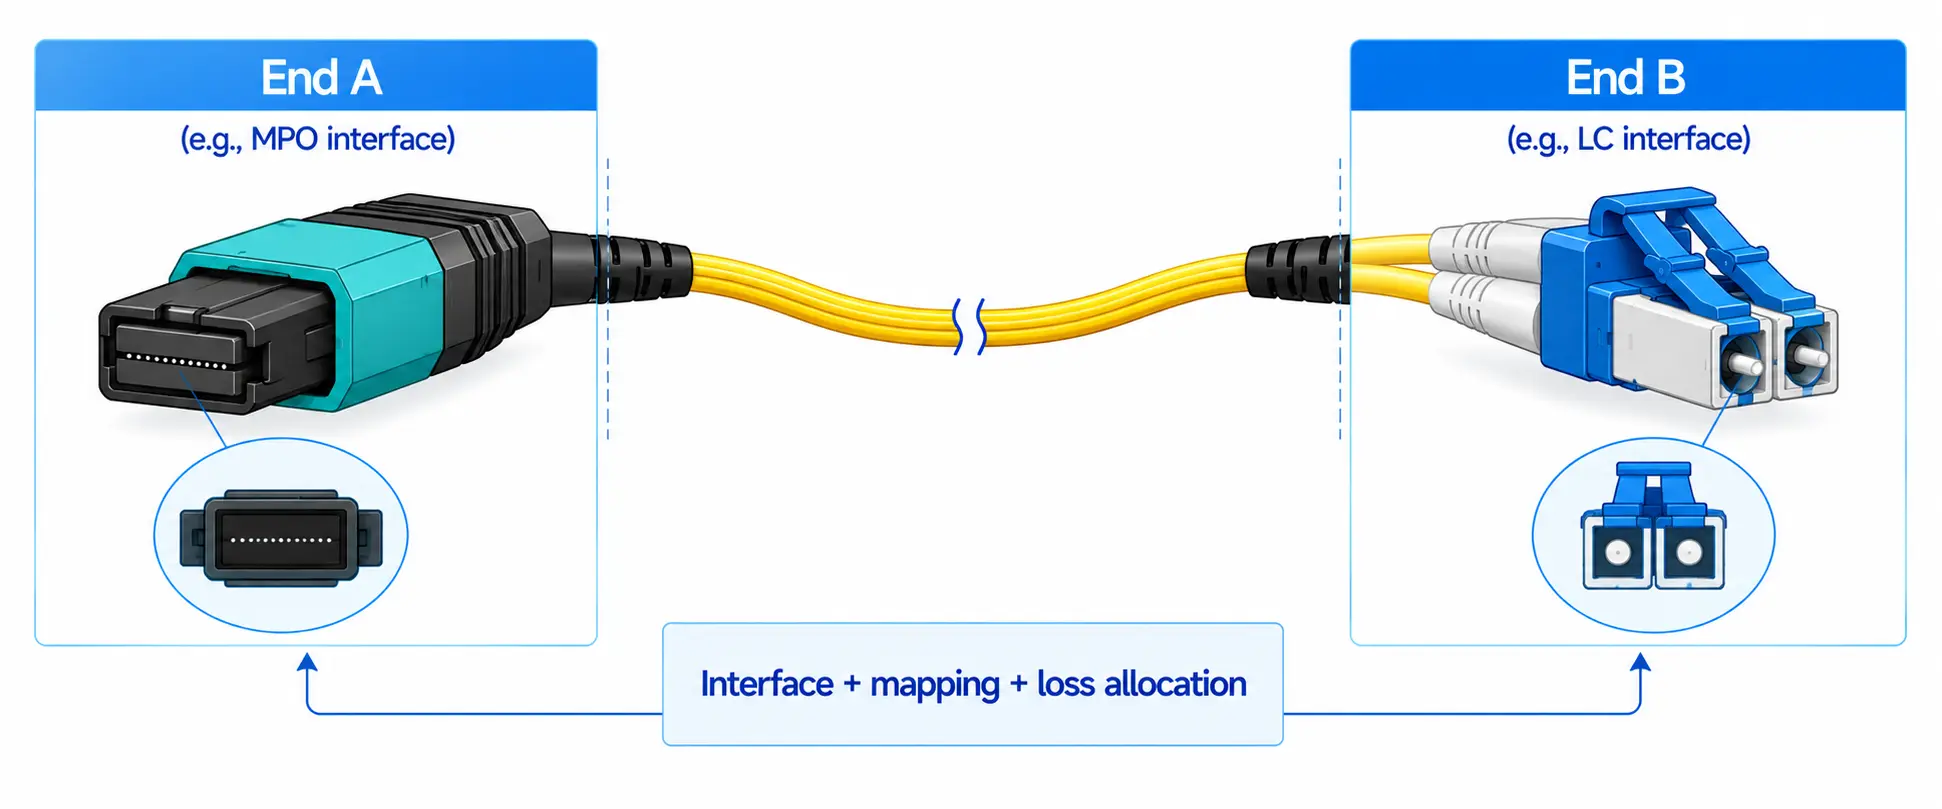
A breakout or fanout assembly converts an MPO interface into multiple lower-count connections such as duplex LC. It can support switch-port breakout, migration between parallel and duplex architectures, or connections between equipment with different connector formats.
The breakout map has to match the MPO fiber positions and the lanes expected by the equipment. For design examples and selection points, see the MPO breakout cable guide.
MPO Cassette
A cassette creates an enclosed transition between an MPO trunk and another connector format, often LC. Cassettes improve modularity and administration, but every added mated pair contributes to channel loss. The full optical path must therefore be checked against the application's permitted loss.
MPO for 40G, 100G, 200G, 400G and 800G
Line rate can narrow the range of likely interfaces, but it should never be the final cable-selection criterion.
40G and 100G SR4
SR4 applications are classic examples of parallel optics using four transmit and four receive lanes. They commonly use eight active multimode fibers through an MPO interface. When an existing multimode plant is reused, confirm the fiber grade, reach and total channel loss rather than assuming that connector compatibility alone makes the link viable. Dimi Fiber's multimode fiber distance guide can help with the media side of that check.
200G Parallel Optics
Some 200G interfaces use parallel lanes and MPO connectivity, while other 200G implementations use different optical architectures. The product data sheet should determine fiber count, polish, connector and breakout requirements.
400G: One Speed, Several Connector Choices
400G is a useful case because it makes the selection problem obvious. In Cisco's QSFP-DD portfolio:
- QDD-400G-SR8-S uses MPO-16 APC over multimode fiber.
- QDD-400G-DR4-S uses MPO-12 over parallel single-mode fiber.
- QDD-400G-FR4-S uses duplex LC over single-mode fiber.
All three are 400G modules, but they do not use the same cable. For single-mode media decisions beyond the connector itself, see Dimi Fiber's OS1 vs OS2 single-mode fiber guide.
800G: MPO-16 Is Not Universal
Cisco's OSFP portfolio provides a second useful example. The OSFP-800G-DR8P uses an MPO-16 interface, while the OSFP-800G-DR8 uses two MPO-12 interfaces. The speed is the same; the connector arrangement is not.
Form factor also does not fully define the optical interface. For more background on one common high-density form factor, see the QSFP-DD technical overview.
How to Choose the Right MPO Connector in 7 Steps
Step 1: Identify the Exact Equipment Interface
Record the manufacturer and exact transceiver or equipment part number. Do not stop at "400G," "800G," "QSFP-DD" or "OSFP." Those labels can cover multiple optical interfaces.

Step 2: Confirm Fiber Type and Reach
Determine whether the link uses single-mode or multimode fiber, then verify the required grade and supported reach. Connector format does not make different fiber media interchangeable.
Step 3: Verify Fiber Count and Ferrule Format
Check how many active fibers and which MPO ferrule arrangement the equipment expects. Confirm whether the interface is MPO-12, MPO-16, MPO-24, dual MPO, an eight-active-fiber arrangement or another configuration.
Step 4: Check Pinning at Both Ends
Determine whether Connector A and Connector B must be pinned or unpinned. Check each mating point independently, especially for direct-to-transceiver links, panel connections and cable-to-cable transitions.
Step 5: Match APC or UPC/PC
Use the end-face geometry required by the actual mating interface. Do not infer polish from jacket color, fiber type, network speed or a visually similar housing.
Step 6: Design the End-to-End Polarity
Trace the complete channel through patch cords, adapters, trunks, cassettes and breakouts. The final test is simple: every transmitter must arrive at the intended receiver.
Step 7: Verify Construction and Loss Budget
Finish the purchase specification with cable length, jacket or environmental rating, bend and routing requirements, labeling, breakout details and insertion-loss limits. Count all relevant mated pairs and passive components in the planned link. Dimi Fiber's fiber insertion-loss guide explains how connector and component losses accumulate across a channel.
Why "400G MPO Cable" Is Incomplete
Suppose a purchasing request says only: "Need a 400G MPO cable." That request is not ready for ordering.
If the installed module is Cisco QDD-400G-DR4-S, the Cisco data sheet points to an MPO-12 parallel single-mode interface. If the module is QDD-400G-SR8-S, the same 400G portfolio uses MPO-16 APC over multimode fiber. If the module is QDD-400G-FR4-S, the equipment connection is duplex LC rather than MPO.
The correct procurement sequence is therefore:
- Record the exact module part number.
- Read the manufacturer's optical connector and fiber specification.
- Match the required ferrule format, fiber count and polish.
- Check the pinning expected at each mating point.
- Trace polarity through every intermediate component.
- Calculate the complete channel loss.
- Write those fields into the purchase order or BOM.
This is more robust than a speed-based lookup table because it still works when a new optical module changes the connector arrangement.
Installation, Inspection and Cleaning
An MPO ferrule carries many fiber end faces at one connection point, so contamination can affect several channels at once. Connector cleanliness should be treated as part of commissioning, not as a cosmetic detail.
US Conec's MTP® connector FAQ states that inspecting and cleaning when necessary before mating is a best practice. It also describes cleaning methods for MT ferrules and MTP® connectors.
Before Installation
- Confirm connector type, fiber count, pinning, polish and polarity label.
- Verify the cable ID, destination and routing plan.
- Keep protective caps in place until the connection is ready for inspection.
Before Mating
- Inspect the end face using equipment appropriate for the connector format.
- Clean when inspection indicates contamination or when required by the approved procedure.
- Inspect again before making the connection.
After Installation
- Verify end-to-end fiber mapping and polarity.
- Measure or validate optical loss as required by the commissioning plan.
- Confirm link operation.
- Document the final channel so future technicians do not have to reconstruct it from labels alone.
Common MPO Specification Mistakes
- Ordering by Ethernet speed: "400G" or "800G" is not a connector specification.
- Using MPO and MTP as unrelated terms: MTP® is a branded MPO connector family, not a separate connector standard.
- Assuming multimode always means UPC: Current multimode modules can use APC MPO interfaces.
- Letting fiber type dictate polish: The mating interface determines polish.
- Ignoring pinning: Correct fibers and polarity do not compensate for the wrong pin relationship.
- Treating polarity as a cable-only property: Tx/Rx mapping must be correct across the complete channel.
- Assuming MPO-12, MPO-16 and MPO-24 are interchangeable: They can differ in ferrule layout, keying and equipment-interface requirements.
- Ignoring cumulative insertion loss: Adapters, cassettes, patch cords and other mated pairs all consume part of the optical budget.
FAQ
Q: What is an MPO connector?
A: An MPO connector is a standardized multi-fiber optical connector interface that aligns several fibers in one rectangular connector. It is commonly used in high-density cabling, preterminated systems and parallel-optics links.
Q: What is the difference between MPO and MTP?
A: MPO is the standardized connector family. MTP® is US Conec's branded MPO connector family. Whether two assemblies will work together still depends on the complete interface specification, including ferrule format, pinning, polish and polarity.
Q: What is the difference between MPO-12 and MPO-16?
A: MPO-12 and MPO-16 use different fiber arrangements and serve different equipment interfaces. Do not choose between them by network speed alone; match the transceiver or equipment connector specification.
Q: Do I need MPO-16 for 800G?
A: Not necessarily. Current 800G equipment includes both MPO-16 and dual-MPO-12 implementations. Check the exact module part number and data sheet.
Q: What polarity should I use for an MPO cable?
A: There is no universal answer without the rest of the channel. Method A, B and C describe component-level mapping approaches, but the complete link must still connect each Tx lane to the intended Rx lane.
Q: Is APC only for single-mode MPO connectors?
A: No. Some current multimode optical modules use APC MPO interfaces. Match the end-face geometry specified for the equipment rather than inferring it from fiber type.
Q: Can I choose an MPO cable based only on 400G or 800G speed?
A: No. The same Ethernet speed can be delivered through different optical interfaces. The transceiver data sheet determines whether the connection uses MPO, LC or another format and, if it uses MPO, which MPO configuration is required.
Conclusion
The key to choosing an MPO connector is the selection sequence, not a memorized speed-to-connector rule.
Start with the exact transceiver or equipment interface. Then verify fiber type, fiber count, ferrule format, pinning, polish, polarity, cable construction and the complete optical loss budget. When those fields are documented in the BOM or purchase specification, MPO selection becomes repeatable and much less dependent on assumptions.
For existing infrastructure, record the equipment interfaces and trace the complete fiber map before replacing or extending a link. For new projects, standardize the approved MPO configurations for the site and keep the corresponding channel maps with the cabling documentation.